
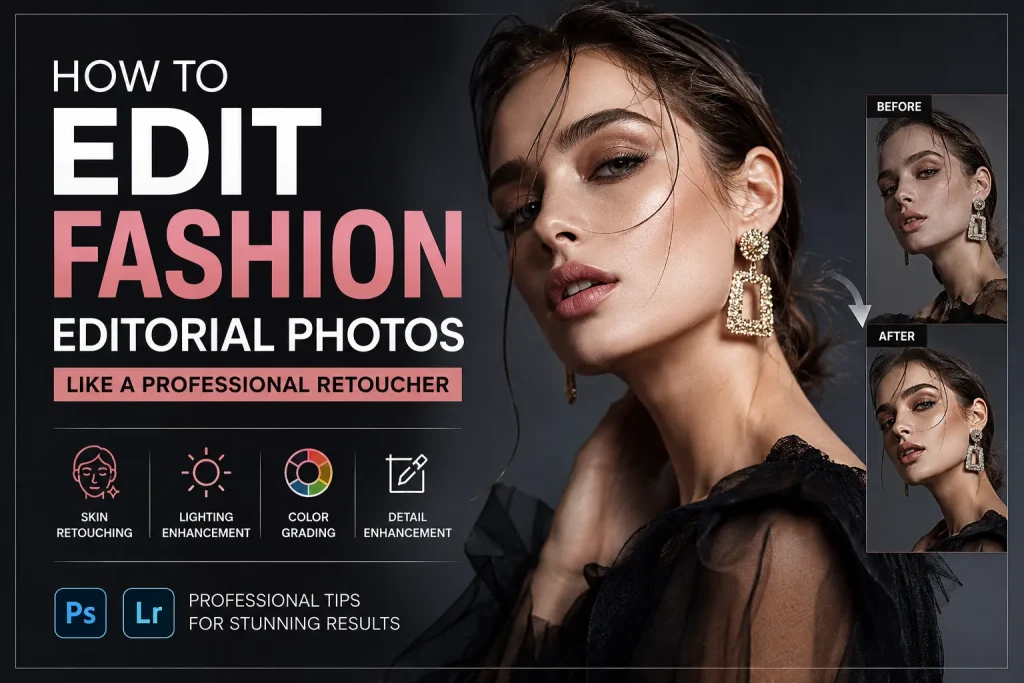
Fashion editorial photography is all about telling a story. Every image should capture emotion, style, personality, and creativity while keeping the model and clothing looking their absolute best. However, even the most beautiful photograph taken with a professional camera is rarely ready for publication without editing. That is where professional retouching makes a huge difference. Knowing How to Edit Fashion Editorial Photos is an essential skill for photographers, designers, fashion brands, magazines, and anyone who wants to create high-end images that stand out.
When we talk about How to Edit Fashion Editorial Photos, we are not simply talking about applying a few filters or increasing brightness. Professional retouching is about enhancing an image while preserving its natural beauty. The goal is to improve every detail without making the photo look fake or over-edited. Every adjustment should support the story that the image is trying to tell.
Many people believe that fashion retouching is only for luxury brands or famous magazines, but that is no longer true. Today, online stores, clothing brands, influencers, photographers, and even small businesses need polished editorial images to compete in a crowded digital world. Learning How to Edit Fashion Editorial Photos can help create stronger visual content that attracts more viewers and leaves a lasting impression.
In this guide, we will explain How to Edit Fashion Editorial Photos step by step using simple language that is easy to understand. We will cover everything from preparing the image to skin retouching, color grading, background cleanup, sharpening, and final export. Whether you are a beginner or already have some editing experience, this guide will help you understand the complete professional workflow.
Understanding the Purpose of Fashion Editorial Retouching
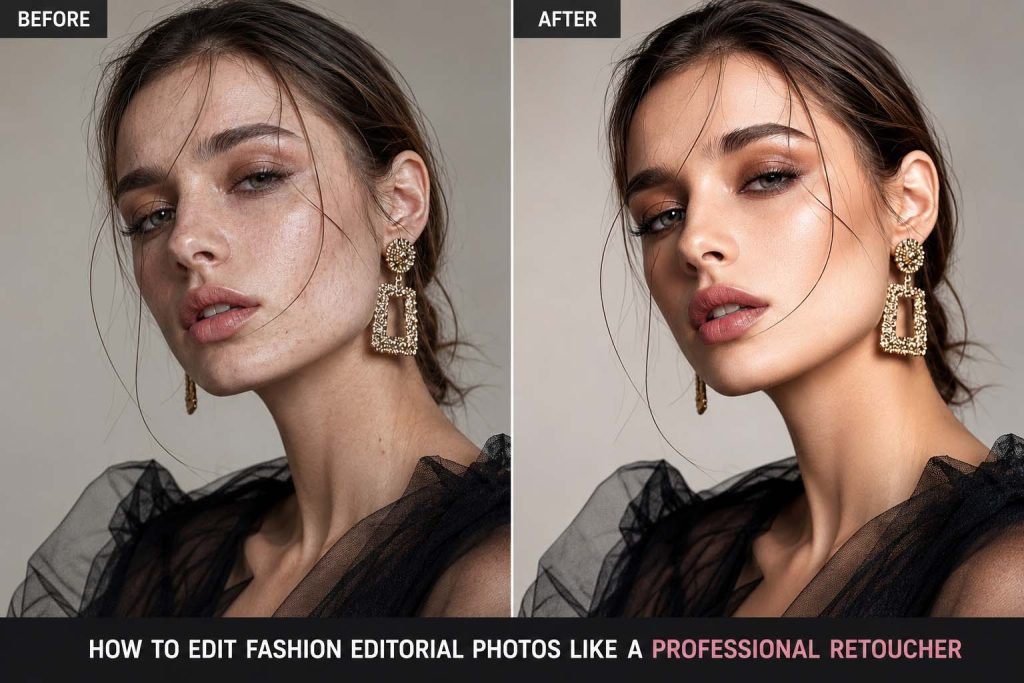
Before opening Photoshop or Lightroom, it is important to understand why fashion editorial photos are edited differently from regular portraits. Editorial photography focuses on storytelling, mood, fashion, and artistic expression. Every edit should support the overall concept instead of distracting from it.
When learning How to Edit Fashion Editorial Photos, we always begin by studying the image carefully. We examine the lighting, colors, clothing textures, makeup, hair, and background. Every photograph has its own personality, and the editing style should match that personality.
Professional retouchers do not aim to make every model look perfect by removing every natural feature. Instead, they enhance what already exists. Natural skin texture, realistic shadows, and authentic colors make editorial photographs feel premium. Over-editing often removes character and makes the final result appear artificial.
Another important goal is consistency. Editorial photo series often include many images from the same shoot. Every image should have matching colors, brightness, contrast, and overall style so that the collection looks cohesive.
Start with the Best RAW File
One of the most important lessons in How to Edit Fashion Editorial Photos is starting with the highest-quality image available. Professional photographers usually shoot in RAW format because it contains much more image information than JPEG files.
RAW files preserve highlights, shadows, color details, and dynamic range. This gives much greater flexibility during editing. If the exposure is slightly dark or the white balance is incorrect, these issues can often be corrected without losing image quality.
When importing the image into Lightroom or Adobe Camera Raw, we usually avoid making dramatic changes immediately. Instead, we make small improvements to exposure, contrast, highlights, shadows, whites, and blacks. These basic adjustments create a balanced image before detailed retouching begins.
White balance is another critical adjustment. Skin tones should look natural and consistent. If the image appears too warm or too cool, adjusting the temperature slider helps achieve realistic colors before moving into Photoshop.
Lens correction should also be applied during this stage. Camera lenses sometimes introduce distortion or dark corners called vignetting. Correcting these issues provides a cleaner foundation for professional editing.
Clean the Image Before Detailed Retouching
A professional workflow always starts by cleaning unnecessary distractions. This is one of the easiest ways to improve a fashion image.
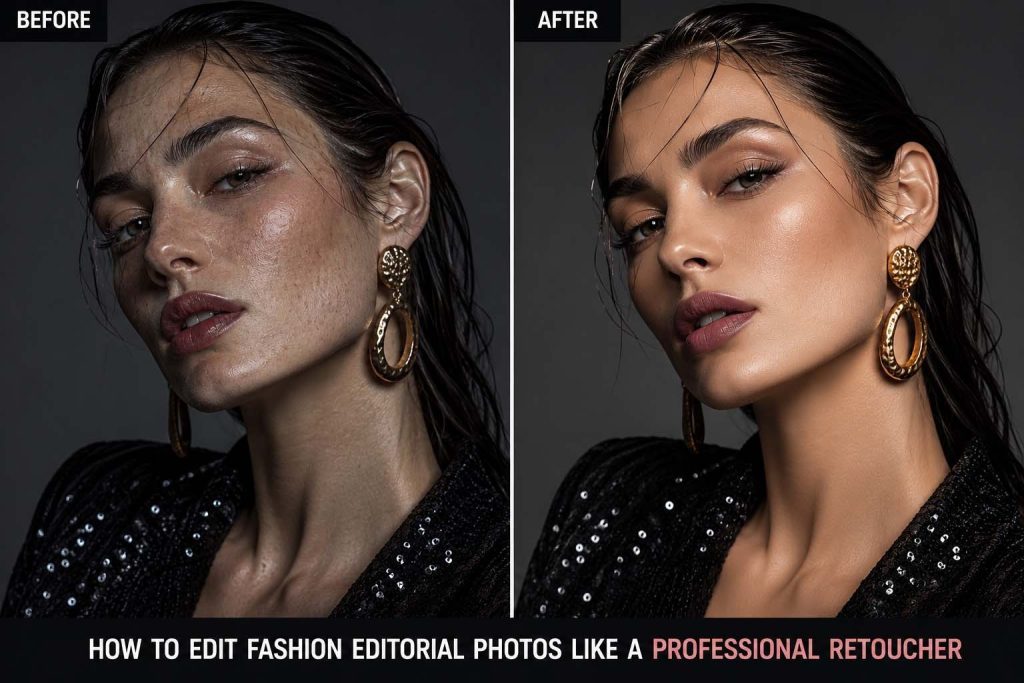
Understanding How to Edit Fashion Editorial Photos means paying attention to even the smallest imperfections. Dust spots, sensor marks, wrinkles in the background, loose hairs, temporary skin blemishes, lint on clothing, and small distractions should all be removed carefully.
The Healing Brush Tool, Spot Healing Brush, and Clone Stamp Tool are commonly used for this purpose. These tools help remove unwanted objects while preserving the surrounding texture.
Hair cleanup is especially important in fashion photography. During outdoor shoots, wind often causes stray hairs to cover the face or clothing. Removing only the distracting hairs while keeping natural volume creates a polished but realistic appearance.
Clothing should also be inspected closely. Small wrinkles, threads, dust particles, and fabric imperfections may distract viewers from the overall fashion presentation. Cleaning these details allows the clothing itself to become the main focus.
Master Professional Skin Retouching
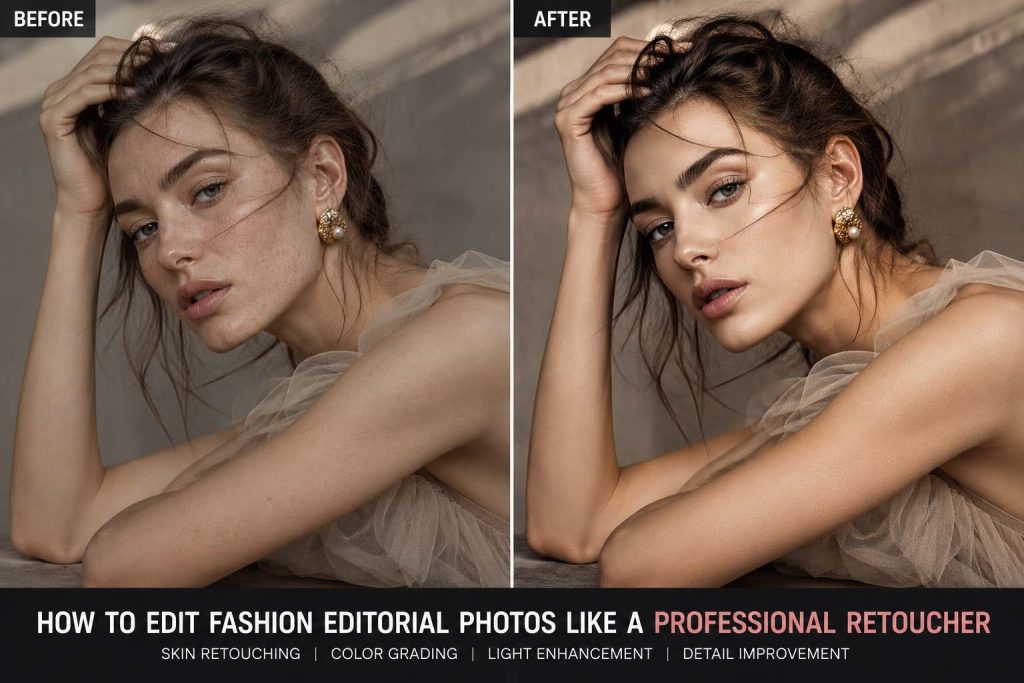
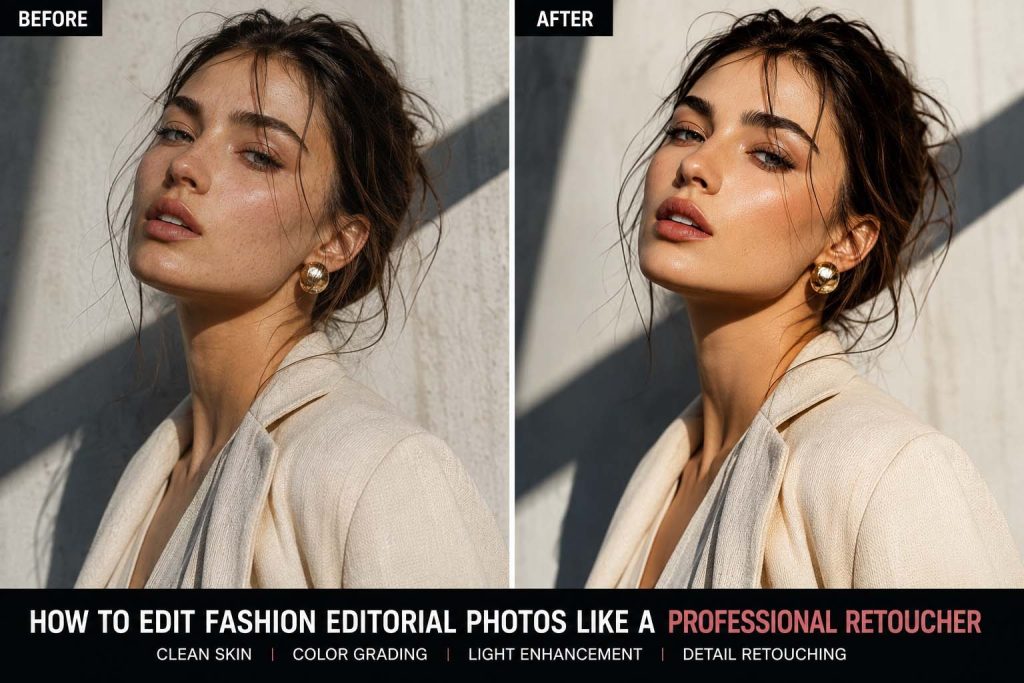
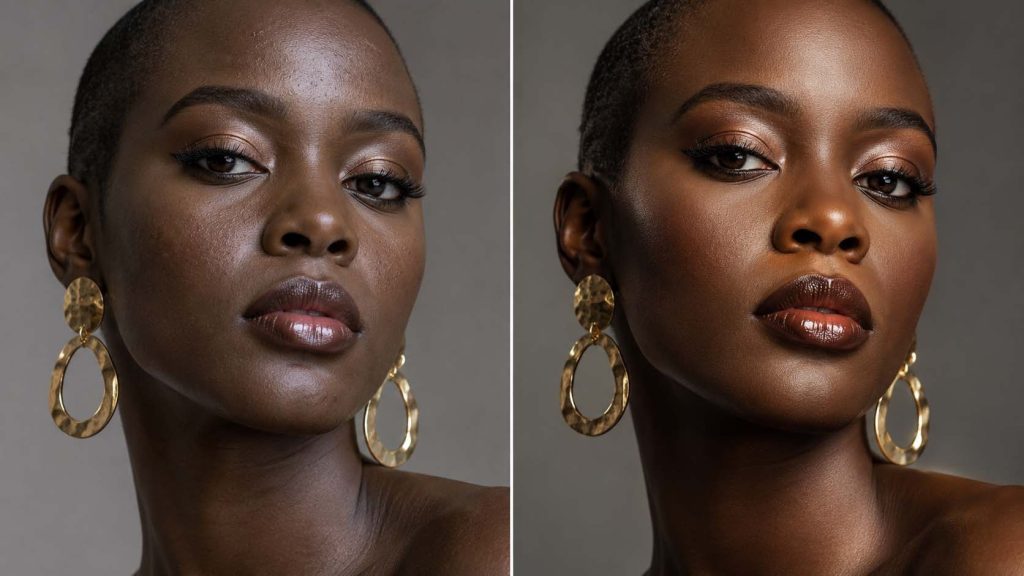
Skin retouching is one of the most challenging parts of How to Edit Fashion Editorial Photos. Many beginners make the mistake of smoothing the skin too much until it looks like plastic. Professional retouchers take a completely different approach.
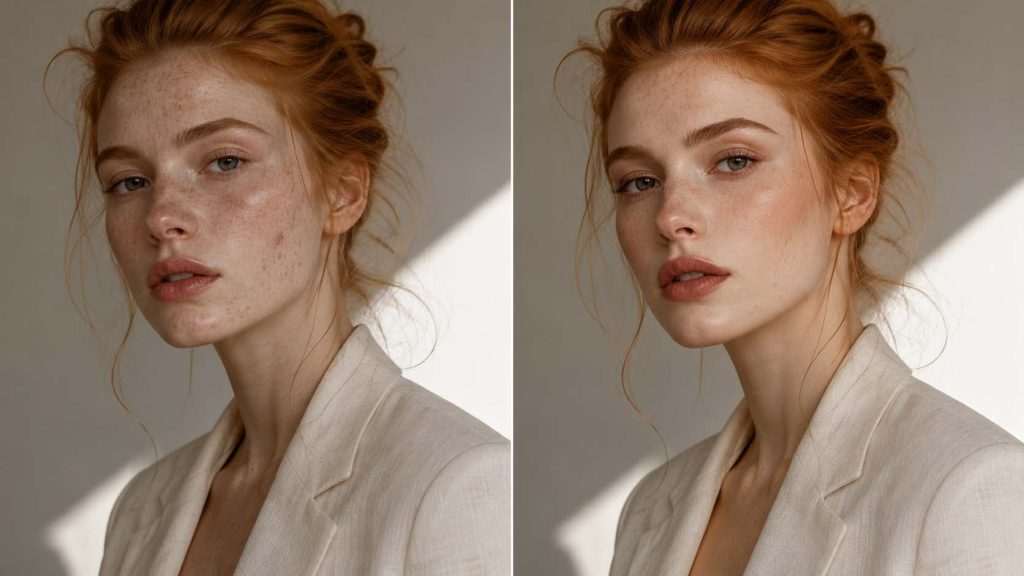
Beautiful skin is not completely smooth. Real skin has pores, texture, tiny color variations, and natural highlights. The goal is not to erase these features but to reduce distractions while maintaining realism.
Frequency Separation is one of the most popular professional techniques because it separates texture from color. This allows uneven skin tones to be corrected without damaging the skin texture.
Another advanced method is Dodge and Burn. Instead of blurring the skin, Dodge and Burn uses light and shadow adjustments to smooth transitions naturally. Although this technique takes more time, it produces much more realistic results.
Temporary blemishes such as acne, scratches, or minor redness can usually be removed because they are not permanent features. However, permanent characteristics like freckles, birthmarks, and natural beauty marks often contribute to the model’s identity and should be preserved unless the creative direction requires otherwise.
The eyes, lips, and eyebrows should also receive careful attention. Small improvements in brightness, sharpness, and contrast help these features stand out while still looking natural.
Enhance Colors Without Making Them Look Fake
Color grading plays a huge role in How to Edit Fashion Editorial Photos because color creates mood and emotion.
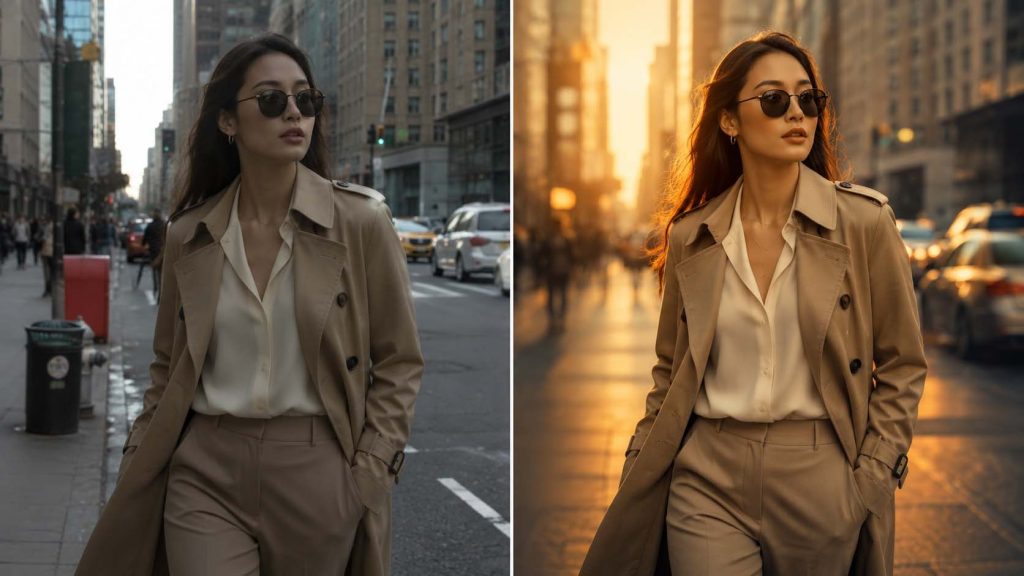
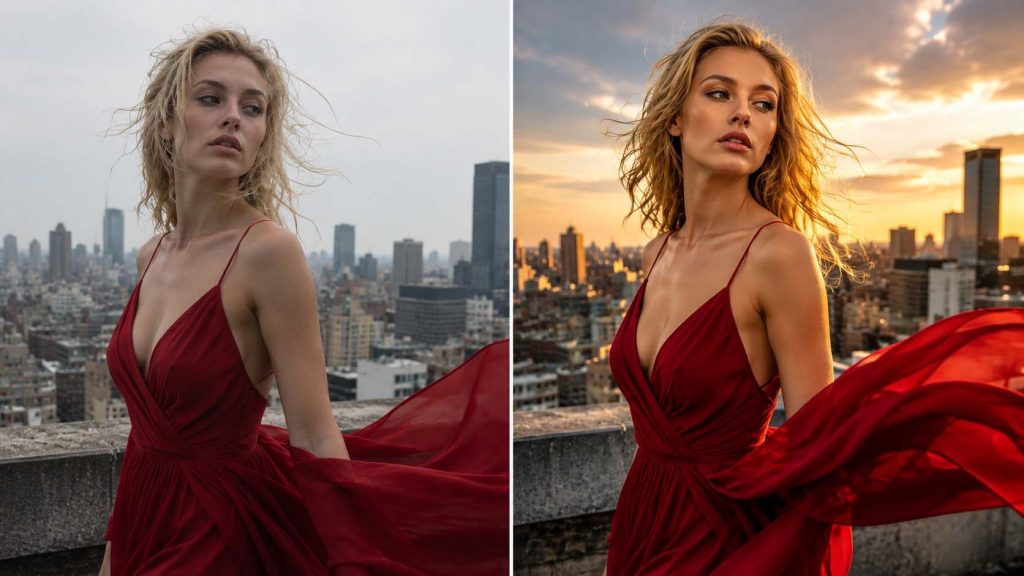
Luxury fashion editorials often have carefully balanced color palettes. Some images use warm golden tones for elegance, while others use cool colors for a modern editorial feel. The chosen color style should match the clothing, makeup, location, and overall concept.
Rather than increasing saturation dramatically, professional editors usually make selective color adjustments. Skin tones remain natural while clothing colors become richer and more vibrant.
The HSL panel in Lightroom provides excellent control over individual colors. Instead of changing every color equally, each color channel can be adjusted separately for hue, saturation, and luminance.
Color grading tools also help unify the shadows and highlights. Adding subtle complementary colors can create cinematic depth without making the photograph look unrealistic.
Professional editors constantly compare before-and-after versions during this process. This helps ensure the final image remains believable while still achieving a polished editorial appearance.
Create Depth with Dodge and Burn
One technique that separates beginner editing from professional retouching is Dodge and Burn. It may seem like a simple adjustment, but it has a dramatic impact on the final image.
Dodge lightens selected areas, while Burn darkens others. Together, they sculpt the face, define clothing folds, enhance muscle definition, and create dimensional lighting.
When learning How to Edit Fashion Editorial Photos, many people focus only on removing imperfections. However, adding depth is equally important. Carefully applied Dodge and Burn creates a three-dimensional appearance that makes fashion images look more dynamic and expensive.
Professional retouchers work with very soft brushes and extremely low opacity. Instead of making large changes at once, they gradually build the effect over many small brush strokes. This slow process produces natural-looking results that viewers rarely notice consciously—but they immediately feel the difference.
The same technique can also enhance fabric textures, jewelry, accessories, and even the natural contours of the face without changing the person’s identity.
Refine the Background and Keep the Focus on the Fashion
Another important part of How to Edit Fashion Editorial Photos is making sure the background supports the subject instead of distracting from it. A fashion editorial image should naturally draw the viewer’s attention to the model, clothing, and overall story. If the background contains unwanted objects, bright distractions, or uneven lighting, it can reduce the impact of the photograph.
We always begin by carefully examining every corner of the image. Small distractions such as litter on the ground, electrical wires, unwanted reflections, wrinkles in a backdrop, or random objects can pull attention away from the fashion. Using tools like the Clone Stamp, Healing Brush, and Content-Aware Fill, we can remove these elements while keeping the background looking realistic.
Sometimes the background only needs a slight adjustment rather than a complete replacement. A subtle reduction in brightness or saturation can help the clothing become the main focus. If the background is too sharp, applying a gentle blur can create more depth and make the subject stand out naturally. The key is to improve the composition without making it obvious that editing has taken place.
When learning How to Edit Fashion Editorial Photos, remember that the background is part of the story. Every adjustment should help strengthen the overall mood rather than compete with the subject.
Make Clothing Look Its Best
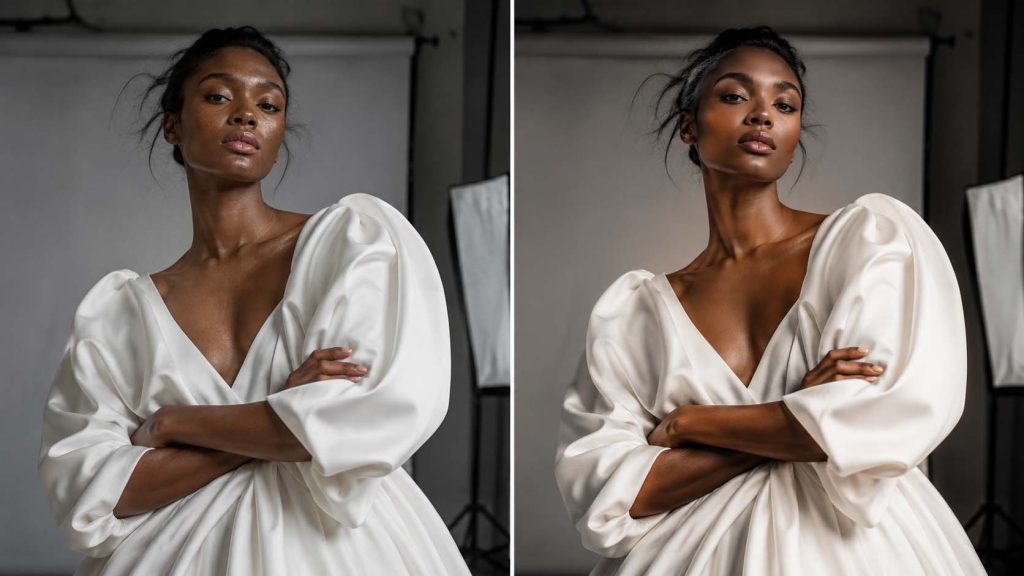
Fashion editorial photography is ultimately about showcasing clothing, accessories, and style. Even if the model looks amazing, poorly edited clothing can reduce the overall quality of the image. This is why clothing retouching deserves as much attention as skin retouching.
One of the first things we check is the fabric. Small wrinkles, lint, loose threads, dust particles, and minor imperfections can often be removed without changing the natural appearance of the garment. Different fabrics also reflect light differently, so careful editing helps preserve their unique texture.
Color accuracy is another essential step. A designer wants the clothing to appear exactly as intended. During How to Edit Fashion Editorial Photos, we avoid changing clothing colors too much unless the creative direction specifically requires it. Instead, we enhance the richness of the colors while keeping them true to life.
Details such as embroidery, sequins, lace, leather, or denim should remain crisp and well-defined. These textures often represent the craftsmanship of the garment, and preserving them helps create a premium editorial look.
Improve Hair, Makeup, and Accessories
Hair and makeup are carefully planned before every fashion shoot, so they deserve careful attention during editing as well. Rather than changing the hairstyle or makeup completely, we focus on enhancing what is already there.
Loose hairs crossing the face can be distracting and are usually removed. At the same time, we avoid removing every small strand because natural hair movement adds realism to the photograph.
Makeup should remain balanced. Lip color can be enhanced slightly, eyelashes may be defined a little more, and eye makeup can be cleaned up where necessary. The goal is to maintain the original makeup artist’s work while making it look polished in high resolution.
Accessories such as jewelry, watches, handbags, sunglasses, or shoes also deserve attention. Removing fingerprints, dust, or reflections helps these items appear clean and luxurious. Small highlights can also be enhanced carefully so metallic surfaces sparkle naturally without becoming overly bright.
Sharpen the Right Details
A professional editorial image should look crisp without appearing harsh. This is one of the final but most important stages of How to Edit Fashion Editorial Photos.
Sharpening should never be applied equally across the entire image. Instead, we focus on the most important areas such as the eyes, eyelashes, eyebrows, lips, clothing details, accessories, and important textures. Selective sharpening creates a more professional appearance while avoiding unnecessary digital noise.
Too much sharpening can introduce unwanted halos around edges and make skin texture look rough. Professional retouchers always zoom in and out during this stage to ensure the image looks beautiful both up close and at normal viewing size.
Keep the Image Natural
One of the biggest differences between beginners and experienced retouchers is knowing when to stop editing. Many new editors continue making adjustments until the photograph no longer looks real.
Understanding How to Edit Fashion Editorial Photos means knowing that less is often more. Every edit should improve the image without drawing attention to the editing itself. If viewers immediately notice heavy skin smoothing, unrealistic colors, or exaggerated contrast, the editing has probably gone too far.
Natural skin texture, balanced lighting, realistic colors, and authentic facial features help create timeless editorial photographs. Fashion magazines and luxury brands often prefer images that look polished but believable because authenticity builds trust with viewers.
Throughout the editing process, we frequently compare the edited version with the original image. This simple habit helps prevent over-editing and keeps the final result balanced.
Export the Image for Different Uses
Once the editing is complete, the final image should be exported according to where it will be used. Different platforms require different settings.
Images prepared for websites should be optimized for fast loading while maintaining excellent quality. Social media platforms often benefit from slightly different dimensions to display correctly across feeds and profiles. Magazine printing, advertising campaigns, and large banners usually require high-resolution files with appropriate color profiles to ensure accurate printing.
Saving a master PSD or TIFF file with all editing layers is also a smart practice. This allows future changes to be made without starting the editing process from the beginning.
Common Mistakes to Avoid When Learning How to Edit Fashion Editorial Photos
Many beginners improve quickly once they recognize the most common mistakes. One frequent issue is using too much skin smoothing, which removes natural pores and creates an unrealistic plastic appearance. Another mistake is increasing saturation until skin tones become unnatural or clothing colors no longer match the original garments.
Excessive sharpening is another problem because it introduces unwanted artifacts and makes images appear harsh. Heavy vignettes, unrealistic HDR effects, and dramatic filters can also distract from the fashion itself.
Another mistake is editing every image differently within the same photo shoot. Editorial collections should have a consistent visual style so they tell one complete story. Maintaining similar color grading, exposure, contrast, and mood across all images creates a more professional presentation.
By avoiding these mistakes, anyone learning How to Edit Fashion Editorial Photos can achieve cleaner, more refined results that look suitable for magazines, fashion campaigns, portfolios, and luxury brands.
Final Thoughts
Learning How to Edit Fashion Editorial Photos takes time, patience, and regular practice, but every editing session helps build stronger skills. Professional retouching is not about completely changing a photograph. It is about enhancing the beauty that already exists while preserving authenticity. Every adjustment, from exposure correction and skin retouching to color grading and background refinement, should work together to create a polished image that feels natural and visually engaging.
As you continue practicing How to Edit Fashion Editorial Photos, you will begin to notice small details that make a significant difference. Careful skin retouching, realistic color correction, balanced lighting, refined clothing textures, and thoughtful finishing touches all contribute to images that capture attention and leave a lasting impression. The more consistently you follow a professional workflow, the more polished and high-end your fashion editorials will become.
Whether you are editing images for fashion brands, photographers, designers, online stores, magazines, or your own creative portfolio, mastering How to Edit Fashion Editorial Photos will help you produce work that stands out in today’s competitive visual world.
Why Choose Graphics Revive for Professional Fashion Photo Editing?
If editing fashion images feels time-consuming or you want results that meet professional editorial standards, we are here to help. At Graphics Revive, we specialize in high-quality image editing services designed for photographers, fashion brands, eCommerce businesses, agencies, and creative professionals. We focus on natural skin retouching, advanced color correction, clothing enhancement, background cleanup, ghost mannequin editing, clipping path, and many other professional retouching services.
We understand that every fashion image tells a story, and our goal is to help that story shine through clean, realistic, and premium-quality editing. Whether you need a single editorial photograph or thousands of images for a large project, we work carefully to deliver consistent, high-quality results that match your creative vision.
If you are looking for reliable, professional, and detail-focused image editing services, Graphics Revive is ready to help you create fashion photographs that leave a lasting impression.
