If you work with high-quality photos, scanned documents, or design files, you have probably seen TIFF images. They are large, detailed, and great for printing or editing, but sometimes you need to Resize Image Tiff files to make them easier to share, upload, or store. Maybe a client asks for smaller files, a website rejects your upload, or your hard drive is filling up. In all these cases, knowing how to Resize Image Tiff properly will save you time and frustration.
Many people feel nervous when they first try to Resize Image Tiff files, because they worry about losing quality or ruining the original image. That fear is understandable, especially if the image is important or part of a paid project. The good news is that if you follow a few simple steps and understand some basic concepts like resolution, dimensions, and aspect ratio, you can Resize Image Tiff files safely and confidently, whether you are on Windows, Mac, or using an online tool.
In this guide, we will walk through everything step-by-step. You will learn what TIFF files really are, what happens when you Resize Image Tiff images, and exactly how to do it with built-in software and free tools. We will also talk about best practices, common mistakes, and when it makes sense to call in a professional image editing team for help.
Understanding TIFF files before you Resize Image Tiff
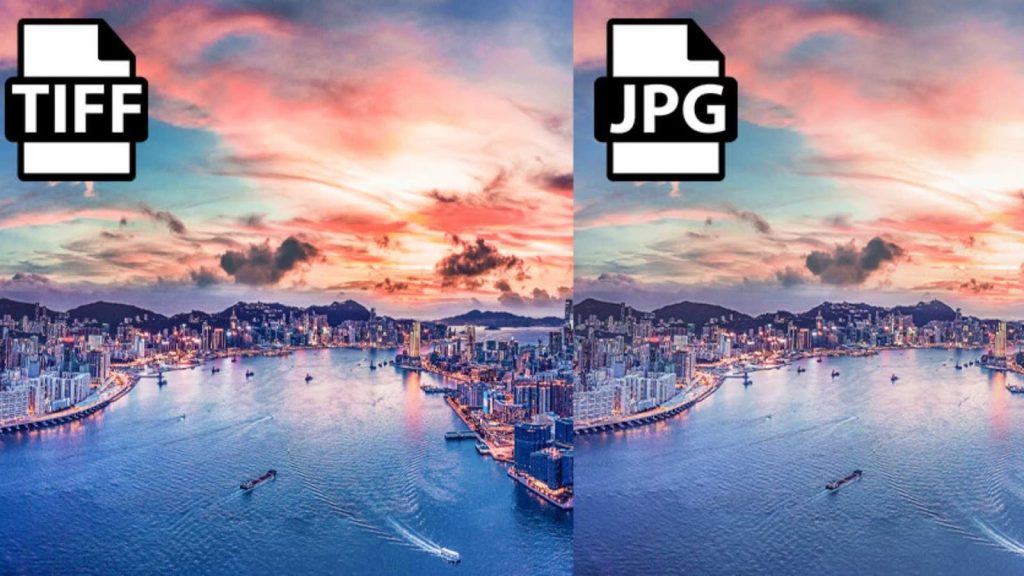
Before you Resize Image Tiff, it helps to know what makes TIFF different from formats like JPG or PNG. TIFF (Tagged Image File Format) is commonly used by photographers, designers, and print professionals because it supports very high quality, multiple color spaces, and sometimes multiple layers or pages. That is why TIFF files are often much bigger than normal images.
When you plan to Resize Image Tiff, you are usually changing one or more of these things: the width and height in pixels, the resolution in DPI (dots per inch), and sometimes the file’s compression settings. Changing these parameters can reduce file size, but each decision affects how your image looks on screen and in print.
For example, if you Resize Image Tiff by cutting the pixel dimensions in half, you will see a smaller image on screen and a lighter file size. If you only change the DPI (say from 300 DPI to 150 DPI) while keeping the same pixel dimensions, the file will print at a larger size but it may not look as sharp in a high-end print job. Understanding this difference is key before you Resize Image Tiff for a specific use, such as email, web upload, or printing a poster.
Key concepts to know before you Resize Image Tiff
When you Resize Image Tiff, three concepts matter most: pixel dimensions, resolution, and aspect ratio. Pixel dimensions are simply how many pixels wide and how many pixels tall your image is. Resolution, often written as 72, 150, or 300 DPI, connects your pixel count to the size of the print. Aspect ratio is the relationship between width and height, such as 3:2 or 4:3.
If you Resize Image Tiff and change the width and height without locking the aspect ratio, the image can become stretched or squished. Most software includes a checkbox like “Constrain proportions” or “Scale proportionally,” and it is usually best to keep this enabled unless you have a special reason not to. This way, when you Resize Image Tiff, the image retains its natural shape.
Another important decision is whether you are resizing for screen or print. For screen use, such as websites or social media, you typically Resize Image Tiff to lower pixel dimensions and sometimes export to a different format like JPG or PNG. For print, you may keep higher resolution and larger pixel dimensions but still Resize Image Tiff slightly to match the exact size needed by a printer or magazine.
How to Resize Image Tiff on Windows
If you are on a Windows computer, there are several simple ways to Resize Image Tiff without needing expensive software. You can use the built-in Photos app, Microsoft Paint, or third-party tools. The basic idea is always the same: open the file, find the resize or image size option, adjust the dimensions, and save a copy.
To start with the Photos app, right-click your TIFF image and open it with Photos. Once the image is open, look for the resizing or editing options in the menu. When you choose to resize, you will usually see options for predefined sizes or a custom size. If you choose a custom size, you can manually type in a new width or height. Make sure any option that keeps aspect ratio is checked, to avoid distortion when you Resize Image Tiff.
Another way to Resize Image Tiff is by using Microsoft Paint, which is included on most Windows systems. Open Paint, load your TIFF file, and find the “Resize” option. You can scale the image by percentage or by specific pixel values. Changing by percentage is helpful if you simply want to reduce the size gradually, for example shrinking the image to 50% of the original. Changing by pixels is better when you must Resize Image Tiff to an exact width and height for a specific platform or client requirement.
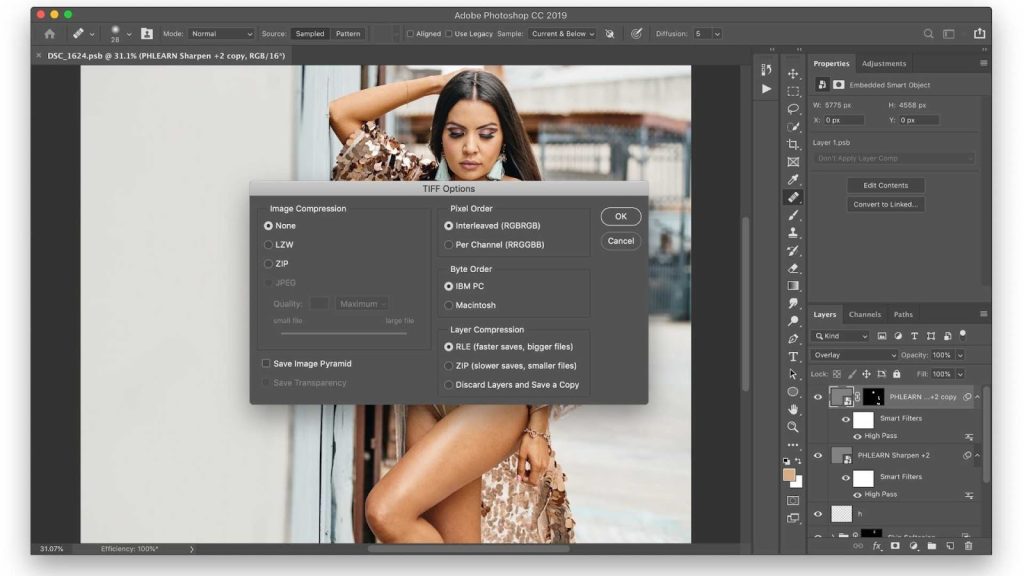
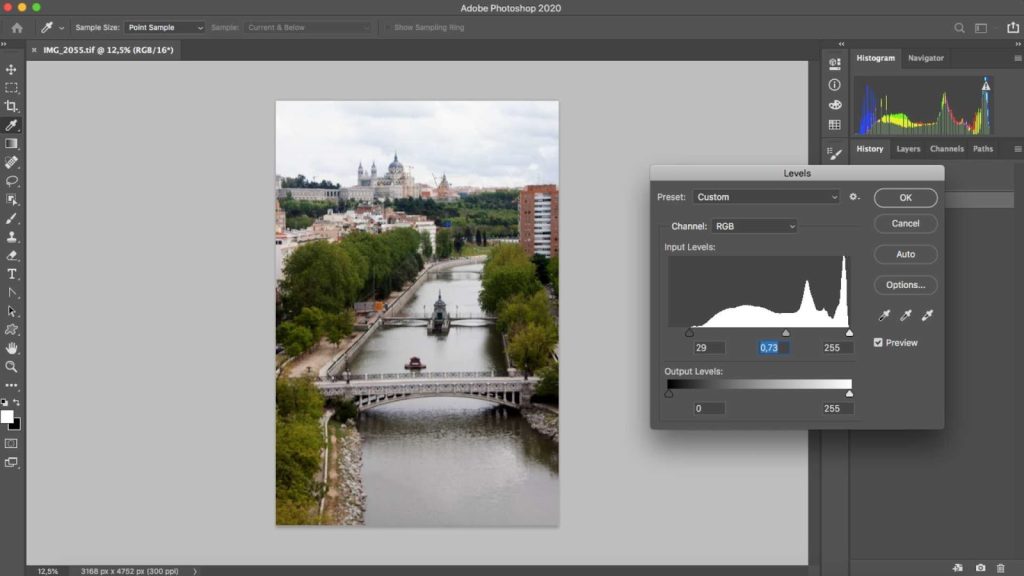
For more advanced control, you might use dedicated image editors like GIMP, IrfanView, or Photoshop. These tools give you more precise control over resolution, scaling algorithms, and output quality. In such software, you can choose different resampling methods when you Resize Image Tiff, such as bicubic or Lanczos, which can help keep edges sharp and minimize artifacts when scaling down large images.
How to Resize Image Tiff on Mac
Mac users also have powerful built-in tools for handling TIFF files. The most common and convenient option is Preview, which is installed on every Mac. Preview allows you to open a TIFF, change its dimensions and resolution, and save a new version in just a few steps.
To use Preview to Resize Image Tiff, open the image and go to the menu where you can adjust the image size. In the image size settings, you will see fields for width, height, and resolution. You can change the units from pixels to centimeters or inches depending on your needs. If you are resizing for web, it is usually best to keep the units in pixels. Make sure the option to scale proportionally is turned on, then type in your new width or height. Preview will automatically adjust the other value so your Resize Image Tiff process keeps the original aspect ratio.
You can also Resize Image Tiff in batches using Preview. If you select multiple TIFF files in Finder and open them together in Preview, you can choose all of them in the sidebar and apply the same size change to every image at once. This is very helpful if you need to Resize Image Tiff files for a full client gallery or a series of scanned pages that must be delivered at the same size and resolution.
The Photos app on Mac can also help if your TIFF files are part of your photo library. You can export the images at a smaller size by choosing custom dimensions during the export process. While Photos does not give as much control as Preview for every scenario, it still offers a friendly way to Resize Image Tiff for everyday sharing.
How to Resize Image Tiff with online tools
Sometimes you may not want to install any extra software, or you might be working from a computer where you cannot install programs. In that case, online tools are a convenient way to Resize Image Tiff directly in your browser. Many websites allow you to upload a TIFF, choose a new size, and then download the resized file.
When using any online website to Resize Image Tiff, pay attention to file size limits and privacy. Some tools limit how big the uploaded file can be, which matters because TIFF files can be quite large. Also, avoid uploading sensitive or private images to random websites. For client work or confidential documents, it is often safer to use offline tools or a trusted image editing service.
Online tools usually offer simple controls: you upload your image, enter either new pixel dimensions or a percentage, and then click a resize button. Some tools even let you convert the format at the same time, such as exporting your resized TIFF to a JPG or PNG, which can be useful for web use. This makes it easy to Resize Image Tiff for social media, email, or website uploads without needing any technical background.
However, because online tools are often built for speed and simplicity, they may not give the same level of quality control as professional software. If you need a very precise Resize Image Tiff result for high-end printing or commercial design, offline editing or professional help is usually a better option.
Best practices when you Resize Image Tiff
There are a few habits you can follow to keep your images safe and maintain quality every time you Resize Image Tiff. One of the most important is to always keep a backup of the original TIFF file. Instead of overwriting your original, save the resized version with a new name, such as adding “_small” or “_web” to the filename. That way, if something goes wrong or you need a different size later, you still have the untouched original.
Another good practice is to think carefully about your final usage before you Resize Image Tiff. If the image is going to be used on a website, you can usually reduce both the dimensions and resolution without any problem. A large TIFF from a camera might be thousands of pixels wide, but a website banner may only need 1200 or 1920 pixels in width. By matching your Resize Image Tiff decision to the final platform, you reduce file sizes and speed up loading times while still keeping the image clear.
For print projects, ask your printer or client what resolution and dimensions they need. Many professional printers prefer 300 DPI at the final print size. For example, if you are printing an A4 page, you can calculate the necessary pixel dimensions from its physical size and resolution. Then you can Resize Image Tiff precisely to match these requirements, ensuring crisp output without unnecessary oversizing.
Finally, learn to use the preview and zoom features in your editing software. After you Resize Image Tiff, zoom in to 100% or more to check for any loss of sharpness or strange artifacts. Scaling down usually improves apparent sharpness, but very aggressive resizing or repeated resizing can degrade quality. If that happens, undo the change and try a slightly larger size or a different resampling method if your software allows it.
Common problems when you Resize Image Tiff and how to fix them
A very common issue when people first Resize Image Tiff is distortion. This happens when the width and height are changed independently without maintaining the original aspect ratio. The image may look stretched horizontally or vertically. To fix this, always make sure the option to lock aspect ratio is selected before you type your new dimensions. If your image already looks strange, you can undo the resize and start again with proportional scaling.
Another problem relates to blurry or soft images after resizing. When you Resize Image Tiff to a much smaller size, some detail will naturally be lost. However, if the image looks unusually blurry, it could be because of the resampling method used, or because the image has been resized multiple times. In many editors, you can sharpen the image slightly after resizing to restore some crispness. It is usually better to do one clean Resize Image Tiff step from the original rather than shrink the image multiple times in separate operations.
File size is another concern. Sometimes you Resize Image Tiff and the file still seems too large. This may be because the TIFF is using no compression or a high-bit-depth color mode that is not needed for your final use. You can try saving in a different TIFF compression mode, or in some cases convert the resized image to a different format like high-quality JPG or PNG for lighter files. However, always check whether your project requires TIFF specifically before changing formats.
When it makes sense to hire professionals to Resize Image Tiff
If you are handling a handful of personal photos, you can probably Resize Image Tiff yourself using the methods above. However, if you are dealing with hundreds or thousands of images for an eCommerce store, catalog, print campaign, or client project, manual resizing becomes tiring and easy to mess up. In those situations, a professional image editing service can save you a lot of time and deliver consistent, high-quality results.
A dedicated team can Resize Image Tiff files in bulk to exact specifications, apply sharpening, color correction, background cleanup, and format conversion, all in one workflow. This is especially useful if your brand or client has strict size and quality guidelines.
If you ever feel overwhelmed managing large TIFF sets, you can work with a specialized service like Graphics Revive. At Graphics Revive, we handle all kinds of image tasks, including bulk Resize Image Tiff jobs for photographers, studios, and online sellers.
How Graphics Revive can help with Resize Image Tiff and more
Graphics Revive is an Image Editing Service focused on helping you get professional-level results without the headache of doing everything on your own. Instead of spending hours trying to Resize Image Tiff files manually, you can send us your images and let our team apply precise resizing, cropping, color correction, background removal, retouching, and format conversions based on your exact instructions.
Whether you are a photographer preparing client galleries, an eCommerce brand optimizing thousands of product images, or a designer delivering print-ready artwork, our editors can Resize Image Tiff files at scale while preserving quality and consistency. We can create multiple versions of the same image for web, print, marketplace listings, and social media, so you do not have to keep resizing the same file over and over.
You can simply visit Graphics Revive, share your project details, and we will help you plan the best way to Resize Image Tiff files and optimize your visuals. By outsourcing this technical work, you free up your time to focus on creativity, clients, and growing your business, knowing that every image is handled carefully by a professional team.
